Sunday 25 November 2007

Back view

You can see from the back view that the shoulder seams are sliding to the back because of my forward shoulders. This makes the sleeves look as if they are twisted. I have this problem on all of my RTW clothes, but at least I can put it right when I make them.

Fitting the top


I will be able to wear this muslin because the fit isn't too bad, there a a couple of things that I will still alter though.
The shoulders aren't to my liking, they need to come forward a little because they are sliding towards the back ( half an inch to the front ), I was going to do a FBA but I have changed my mind, I think it will make it too big at the front. I will make the darts a little shorter ( about half an inch ) also I think I will take the sides in 1/4 inch on all sides so it will be a little bit more fitted at the sides which will make the gathering at the sides a better fit.
That is all, I like the style and it is really comfortable......

Finished top


I have finished this test top ( muslin ).

This top has elastic at the sides, I anchored the elastic at both ends first, then stretched it and sewed it on to the seam with a tricot zig zag stich. The front of the top is crossover so the front has a double layer of stretch fabric to deal with. I used a lightweight iron on interfacing an inch wide at the hemline which made the hems easier to sew without stretching, I also did this at the sleeve hems.

Neckline of top


This fabric is quite tricky to work with.......I have used a size 11 ballpoint needle and the walking foot on my machine. I used a stretch stitch for the darts and seams and for the top stitching I used a medium straight stitch and again used the walking foot.

Top and fabric


Here is the Sandra Betzina top and the fabric I am using.

This is just a test for the fit of the pattern, the fabric only cost me just under £4.00 so it is worth it not to spoil good fabric trying to get the fit right. This design of fabric is different to what I would usually buy but I thought the colours were quite pretty, if it isn't good enough to wear I will throw it away after I have taken note of the adjustments. I haven't worked on knit fabrics all that much and I know they are quite tricky and they tend stretch quite a bit when working on them. I have got a basic overlocker which I have had forever, the hems worry me a bit because I haven't got a cover stich machine, so I will just take my time and make the right decisions as to what to use to get the look I want.

Friday 9 November 2007

Sewing and stamping


I love these stamps, they are very feminine and would be ideal for a birthday, wedding, thank you cards.......I think they are very versatile.


I have been helping Willow with her business over the last few weeks, now the rush is over and I am back to sewing again.


I have started to make a muslin for a Sandra Betzina knitted top Vogue 8151. I have lengthened the pattern by one inch and lowered the bust dart. I am wondering what is going on with the length of the shoulder seams, my measurement is 6.5 inches but the pattern shoulder seam only measures 4inches. I imagine some of the neck band is incorporated into the shoulder seam, I will find out when I have made the test garment. I haven't worked on many stretch fabrics so I will be learning a new skill with this fabric. I will post some photographs later when I am further along with the muslin.
In the meantime here are a few photographs of the cards I have been busy with.

Sunday 7 October 2007

Back view


Here is a back view......I actually look as if I am bow legged, if anything I am knocked kneed lol lol lol

Finished trousers


I finished my trousers a couple of days ago and have just found the time to put them on here.


I am quite happy with the fit, the fabric wasn't that good to work with but I have done my best to make them look like a pair of tailored trousers.

Friday 21 September 2007

Trouser fitting

This pocket is finished, where the white dot is, I am also checking the length of the trousers, bottom white dot.


Here is the fold again with a longer view, I have had to really turn up the brightness so that I can see the image.

I knew when I started these trousers I was going to have bother with this fabric, you can't buy good fabric for £4 a metre.
Everytime I press a seam the fabric creases where steam has been so I haven't pressed the creases in the trousers as you can see. I am pressing my seams as I am going, when I am finished I will put the creases in.
I have another problem......do I put the extra effort in and line them.....is it worth it because I am not happy with the fabric. On a good note though, I like the style and the fit (with a few tweaks here and there) I am happy with them. I thought they maybe a bit too wide but after seeing the photographs they seem alright.

Trouser fitting

I have been fitting my navy trousers, this is a back view, I don't like this fold where the ? mark is. It may be just the way I am standing. I have finished the pocket on the ? mark side and not the other side so once I have finished the other pocket it might eliminate the fold.

Tuesday 11 September 2007

Thread tracing

I have cut my trousers out and started to thread trace. I have marked the darts with chalk and tacks. I am going to try and make these trousers very tailored so I am reading up on the techniques.
I haven't made any really tailored clothes .......such as suits and jackets, so I am going to give it a try, I always stick to safe things that I know I can manage, I pushed the bounderies with the chiffon blouse I made, it was tricky sewing that fabric but I like the results and it boosts your confidence when you have tried something new.
This fabric is a fine wool in dark navy blue, I generally go for a natural fibre with a bit of synthetic........I think this has a little bit of lycra in it.......which means it has stretch.
I got it for £4 a metre and was told it was fabric that is used by m&s, so I thought that can't be bad m&s use good fabric. We will see how they turn out.


Sunday 9 September 2007

Transparent fabric


I thought this picture gives a better idea of how transparent this fabric is.

We had a lovely day.


We have had a lovely day at the christening of my nephew Ellis.
There was a beautiful spread afterwards and a disco for all of the kids, they danced, slid and generally ran amuck on the dance floor and they had a great time. I think there was about 80 people invited, it was more like a wedding than a christening.
I have posted some photographs of my finished blouse. I did make a camisole to go underneath my blouse, it was more like a vest really. I wanted it to cover my bra straps, it is made out of lining fabric....I wanted a duchess satin or a silk but I couldn't get the right colour,those fabrics were just changing the colour of the main fabric so I just opted for lining which was a perfect match, that was a nightmare to sew as well. Never mind I am happy with the results and I felt really comfortable wearing it. Trousers next on the adgenda.
I am shattered now so I'm putting my feet up to watch the telly.


Friday 31 August 2007

Work in progress


I have been on about a fortnight making this blouse for a christening I am going to. I have also got to make a camisole top to go underneath it because the fabric is very see through, it is polyester chiffon, what a nightmare it is, it is certainly make me use my brain sewing this together so it doesn't look too homemade. It frays, slips when you sew it, shows all the inside stitches and the hems have to be handsewn because they don't look right when top stitched. I don't know if I will finish it in time because I don't want to spoil it now by rushing. The christening is next Sunday.

Here are some photographs.

I have put some ties on the back of the blouse for a change. I am in the process of hemming around the neck by hand, I have got half done.


Friday 10 August 2007

My muslin is done


Well I have finished the muslin for my trousers, it wasn't as traumatic as I thought it would be, I have just taken my time and worked my way through the fitting process.

I am quite pleased with the fit although I had to make quite a few alterations to the muslin. The legs on the trousers were really wide so I measured a pair of ready to wear trousers that I liked and tapered these ones to the same width.
I have sat down , bent down and generally moved around with these practise trousers on and they seem fine. They seem to be sticking to my bum in the rear view, oh dear! it's where I've been sitting lol lol lol lol lol
I have chosen to do them in a navy, wool and polyester mix, they will also be lined with side pockets. I have to transfer all of the alterations I have made onto my pattern , then pre shrink my fabric, straighten the grain and wash and press the lining. Only after I have done all of that can I start sewing.
I may have to put them on hold for a couple of weeks because I am going to a chritsening and I could do with a new blouse so I will probably make that first, the same as the one below only in a floaty material.

Wednesday 8 August 2007

Altering my trouser pattern


I need to alter my trouser pattern and make a muslin before I can even start sewing them, this is a pain to do and is the hardest part of dressmaking in my opinion. It involves cutting your pattern out in a cheap fabric, I generally use bleached calico, fitting it to your shape, making a note of the alterations and transferring the alterations to your pattern. It isn't as easy as that because the practise garment is on and off hundreds of times ( well I may be exaggerating just a little) to get the right fit.......I tend to want to overfit, but 2ins of spare room is needed at the hips for comfort so you can sit down.

You may ask why do I do this, the only answer I can come up with is, lovely comfy clothes, no tight waist squeezing the life out of you and crotch seams nearly cutting you in two.

The only trouble is, if my trousers go horribly wrong I won't want to sew anymore ever again as long as I live, then I wake up the next day and start making mistakes all over again lol lol.


Saturday 21 July 2007

Ugh.....Shower

My shower head wasn't functioning the way it should so I decided to buy a new one. I went for a middle of the road one, which I usually do with everything I buy, and it cost me a little over £30.00. Dougy said he wasn't too impressed with it but when I went in tonight it was lovely compared to the little trickle of water from the old one. I was standing there thoroughly enjoying it when all of a sudden the water disappeared and was coming from the bottom of the shower box.......ugh...I am furious.....after buying a new shower head which will be no good to me now, I am probably going to have to have a whole new shower.......I absolutely hate wasting money. I will wrap my new shower head up and put it away safely until needed.
I just thought I would share this little trauma with you.

Blouse


I have left this picture large so you can click on and scrutinize my work.
This fabric cost me £20.oo , I had the thread and buttons, and about 3 weeks work on and off. I still have some fabric left probably enough to make a cushion for the bed or something like that.
I have just clicked on to have a look at this magnified and the pocket doesn't look too good but that isn't a mistake it's my ironing I'm afraid.

All done and dusted


I haven't updated my blog for ages and anyone waiting to see the finished blouse, it has been washed and pressed ready to wear and it fits beautifully. I would have modelled it for you but that would be taking it a bit too far.

Making this up wasn't without it's problems though...if you read the posts below you can see in the photographs I have used a blue pen for marking, I have used theses pens for marking on numerous occasions and as soon as the garment enters water they disappear. Well I have washed this and they didn't disappear completely. I was absolutely mortified. The only thing I can think of is that I used detergent with my first wash, I should have used clear water first. It hasn't turned out too badly though because there is a pattern on the fabric and they don't show up too much. If you are going to use one of these pens for marking be very careful and rinse in clear water first to get rid of the markings and always test on a spare piece of fabric first. I certainly have learnt my lesson.

I am very happy with the finished garment, I have four of these blouses now, I think I may try a silky fabric next.....when, I don't know, I have a few alterations to make to other things and I have a few things to mend.

Tuesday 26 June 2007

Work Horse


This is my much loved machine......I have only had this one a couple of years, the one before this is an embroidery machine which is well used as well, I have pictures on my wall that have been embroidered using this machine.....that one will be about 15 years old and still works well. This machine is heavy weight and and is simply a work horse but it will also do some basic embroidery stitches. This machine is fabulous for heavyweight upholstery fabrics.

My machines a like part of the family to me, I can't bare to part with them......Sharon has my other one at the moment, only on loan of course. I also have an overlocker which I have had forever and that still goes well, I use it all of the time.

The saga continues


I have put the pocket on.....this was an ordeal because it had to be fitted over my boobs........fitted clothes don't look as good as ready made clothes off the clothes hanger because of the unusual shape of them. Can you see the bump where the pocket is, if that was ready made it would be flat.

I managed to match the pocket as well as I could because there is a whopping big dart underneath the pocket. I have also made the collar up, I don't know if I am going to use it yet, I might just make it into a round neck with a facing, I will see how it looks when it is made up.

Sunday 24 June 2007

Right side

This picture is of the back shoulder dart, this dart looks more professional because it isn't so curved.
I must get on with my chores for the day instead of sitting here pondering how to make my darts look more professional lol lol


This is the right side of my dart.....I have done all the things I should have done to make this look professional and it looks far from professional to me, but we will have to wait and see, it's not over till the fat lady sings.......so they say.

Sewing and pressing

I have sewn, pressed and overcasted the two darts in the back of my blouse. When I was fitting this blouse the darts in the front and back were very wide so I decided I would cut them down and make them narrow and overcast them, they really could do with being clipped because they are curved but I thought better of it.
When you look in sewing books at seams that have been sewn they look so perfect.....this is actually the reality of it..... they are far from perfect.

Saturday 23 June 2007

Cut out and marked

This writing on my blog never goes where I want it to....tut....infuriating


Here as you can see I have cut my pattern out and marked it and interfaced the appropriate pieces with iron on interfacing, the blue pen will wash out. I have also tacked the darts ready to sew.
I matched the 2 fronts when I was cutting out, but the rest of it is not matched because it was going to take too much fabric but I am happy with it at the moment.......what it will be like when it's made up I will have to wait and see.


Monday 18 June 2007

Fabric and Pattern


Here is a picture of the fabric and pattern I am using....the fabric is different isn't it lol lol.....I have washed and pressed it ready for cutting out, I won't do that today because I may be going out later. When I saw this fabric made up it was a child's duvet cover.....lol lol......I hope it turns out alright, if it doesn't I can wear it to craft in....Willow thought it would be lovely made into a tote bag.
When I cut this out I will have to make sure I match the pattern fronts, so I won't have to put right sides of the fabric together when I cut it out, I will have to open the fabric out and cut out on the right side, one pattern piece at a time to make sure it matches.


Competition

I told you we were going to a dog competition yesterday, well here is one of the photographs we took.....it was lovely the rain kept off all day, we saw old friends and also made new ones all in all I thoroughly enjoyed it. They are the Cheviot Hills in the background.


Saturday 16 June 2007

Shape

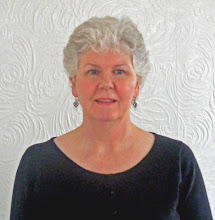
I don't know if anyone can tell by my photograph but I am a funny old shape.........I find it really difficult to find a shirt that fits me comfortably......I am not very keen on collars, they make my neck ache, I don't know why. So I have a favourite shirt pattern that I make my shirts out of, it is a simple round neck with 3/4 sleeves with a slit, a pocket and front fastening. It took me ages to fit this pattern to my shape but once I got it right I can just cut out and make up, I can also put a collar on this shirt because it fits me comfortably.
The reason I am telling you this is because I went into L. Ashley today as you do when you are shopping and I found some lovely cotton fabric that they used made up as a child's duvet cover, well I thought this fabric would make one of my shirts. I bought 2 metres and as it shrinks when you first wash it, I asked the assistant to check for me, I will wash it first, straighten the grain and press it then I will be ready to cut out, mark it and sew. It isn't as quick and easy as that but I am ready for a new one, I already have 3 of these shirts a pink cotton one, a white linen one and a beige linen one. I also have some pale lemon fabric to make another one. When I have washed and pressed the fabric I will take a photograph of it with the pattern.


The weather we have had over the past few days has been absolutely dreadful, the tall flowers in the garden have keeled over, rose petals are all over the lawn and I haven't even finished planting my bedding plants.
I hate wet weather because my dogs don't get the exercise they need, I don't mind showers but 24/7 torrential rain.......no! It looks as if it is going to start again, it's getting very dark......tut....
We are out tomorrow to a dog competition so I hope it dries up a little.

Wednesday 30 May 2007

Goody Bag


This is a goody bag made with the daisy tartan paper, fairy dust bag and cup cake stamps. The idea is to give these goody bags to children as they leave a party, but you could use them for adults and fill them with chocolates or a small gift, a piece of birthday cake anything you like really and make the appropriate header card.

Magical Day Card


Here is my magical day card using the fairy dust bag and cup cake stamps, the paper is daisy tartan all from Willow Designs. I used my cricut machine and Jasmine for the font and the candles are from the Celebrations cartridge.

Wednesday 2 May 2007

My Wedding Photographs


Here are two of my wedding photographs.......the one with the wedding cake was chewed by a little Yorkshire terrier we used to have and I have digitally repaired it.....I have got to give myself a round of applause for that because I thought it was lost forever.....I am delighted.
My intention is to design a paper especially for these photographs, I only scrapbook in 8 x 8 so I will do a double page LO.

I have a , what we would call a proper, album which Dougy had done for me on our 1st wedding anniversary as a surprise and it is rather beautiful. These photographs are the proofs, the best of course were kept for the album and they are a lot bigger than these are. I like these two.....I have lots more that I could fill a whole scrapbook with but I am sticking to a double LO


Thursday 26 April 2007

Flu bug

I have got a dreadful cold.....well I don't know whether it is the flu or just a cold, I feel dreadful, my nose is sore and I can't breathe, I just want to go to bed and lie down.
My work is all up to date for the time being anyway, the cd is done, the A4 layouts are started and the 12 x 12's have been launched. Everything seems to have come together to the onlooker but actually these things have been done for weeks we have been waiting for bits and pieces to arrive in the post before we could put them onto the website.
I am going over to the lake district this weekend with my dogs, if I feel better that is, to a competition....I'm not entering but Dougy is....my dog is still not maturing, she has still got puppy ways lol lol
Sandra

Wednesday 25 April 2007

Baby Layouts


These layouts have been a long time in the making, getting the right quality card is essential for a professional looking finish, I tried all sorts of card and photograph paper but this was by far the best. Most photograph paper and card is not white, as I have found out over the past few weeks and I didn't realise, it certainly makes a difference to the finished result.
The intention is to have lots of different layouts in the future.
Here are our New A4 Layouts.....these are our new baby layouts, everything you need to make a card. These layouts are what we used in the cards and tags below. The card is of the highest quality it is 220gms with a soft sheen finish.

Tuesday 24 April 2007

Baby Cards


I did this baby boy card and tag yesterday but I couldn't photograph it because the light had gone......the papers are our new 12 x 12's.....the tags and oval framies etc. will be coming soon. The baby girl card is also done with our new papers, I just love these they are sooooo sweet. I haven't had the chance to make many baby cards lately so I really enjoyed making these.

Friday 20 April 2007

Art Work Papers


These are our new paper collections. These papers are taken from Willows original art work. The colours are absolutely beautiful.

Wednesday 18 April 2007

New 12 x 12's


This is a very exciting time for us......we are now able to bring new paper products to Willow Designs, these papers are available in 12 x 12......8 x 8 and also A4, they are 120gms acid free and superb quality.....this is just the start of a whole new range of products, these papers are also soon to be available in kit form.......

Sunday 15 April 2007

New FREE Download

Here is your new FREE download available from our website. It consists of 1...... approx. 8" x 8" scrapbook paper and 2 tags, 1 small and 1 large, all of these designs compliment our new Floral CD Rom.
If you are not into scrapbooking I'm sure these designs will make a beautiful card, gift tag or tag card.....whatever you want to do with them I hope you enjoy them.......a gift from Willow Designs ...just for you.
Sandra

Floral Rose


This is the floral rose collection, I have only shown a few of the designs that can be printed but you get all the elements as shown in the lavender collection printed below. I have also included a large tag in all colours it is large enough to cut out and decorate......or if you cut it double would make a lovely shaped card.

More elements from our Floral cd


These papers are what I call plant in a pot also some of the dragonflies and a butterfly I have made up, plus some of the borders. Click on picture to have a closer look.

This is all original artwork from Willow. The card below has 2 little dragonflies around the greetings frame, they were cut from the border that you see in this picture. This is a card I have used with designs from the floral cd.......if you see any dark marks it is because I have used distress inks on it.......it isn't dirty lol lol.

Monday 9 April 2007


This card has been made using the lavender papers below. I used the lavender check, the lavender patchwork frame 2 small dragon flies and the lavender hearts printed onto acetate. I cut an aperture into the centre front of the card, covered the whole of the inside with lavender check and then cut the aperture out again.I attached the acetate to the frame then attached the frame to the card placing it over the aperture. I used the happy birthday frame from Beyond Birthdays using my cricut machine and mounted it onto white card, attached 2 small dragon flies as shown, I then attached 2 small lavender hearts cut from Walk in my Garden also using my cricut.